Added an additional blendshape today for a frown. It will be joint driven like the smile, but I couldn’t use the same set up because the poses are opposite extremes from each other. I still need to work on getting the controls to work with both the smile and frown, right now the controls don’t adjust with the frown so it’s hard to tell which control will deform which part of the frown.
Category: Graduate Thesis
-
No comments on Frown Blendshape
-
Here is my latest update for my thesis rig. The goal is to get it all done by the end of April at the latest.
-
Last week I spoke with my friend James Johnson on the best approach for tackling Billy’s mouth. A surface based solution wouldn’t necesarrily be the best, given how much the corners of his mouth move across his face for different poses.

The solution we decided on was to switch between two different setups. One would be completely blendshape driven, using set driven keys to allow the animator to activate those blendshapes with contollers. The second setup would be joint driven with corrective blendshapes.


The blendshape setup is for the “OO” mouth shape. This way the animator is able to control if the mouth is on the front of the character (for when the camera is directly in front of the character) or at a three-quarter angle (which is the most common angle the character is seen from).

The joint setup is for Billy’s smile. A NURBS surface will be attatched to his lips in order to guide the joints when a blendshape is activated. This will make it more intuitive for the animator so the controls will still be close to the areas they actually deform.
Due to my rig no longer mainly consisting of surface based rigging, it didn’t feel appropriate to keep surface based facial rigging the focue of my thesis. So once again, I am pivoting. I’ve decided to focus more on the actual process of taking an originally 2D character and building a 3D rig for it. My paper will go over the challenges that come with this kind of rig, the importance of keeping the character on model, and how there isn’t a need for custom tools to create such a stylized rig. My visual component will remain unchanged, the only update will be with my research paper.
-
I was able to get on a call with Jonah last night to show him the progress I had made and to ask some additional questions pertaining to his blog. He was able to get more into detail about the nuances between the methods he has documented. His last two methods, Set Driven Keys and Unwrapping Surfaces, were very hard for me to differentiate in terms of creation and result. He was able to break down each method for me so I could get a better understanding of just how they work and why they are differernt.
I was also able to talk to him about any sort of benefit to layer his surface based technique with wire deformers for the eyebrows and extra eye shapes for Billy. My biggest proponent for using the wire deformer is the desirable deformations it gives. But after speaking with Jonah and diving deeper into his methods, the surface based technique alone already gives desirable results in terms of weight distribution and falloff. Since I already have the wire deformers in the works, I will continue going in that direction, but it is something I will keep in mind for improving this rig in the future.
My goal for the end of this quarter is to get the eyebrows and eyes fully functioning and then tackling the mouth for spring quarter.
-
I finally have something working in terms of joints sliding on a surface beyond a planar projection. It took a lot of back and forth between Jonah and I, but I finally got past a road block and got what I needed. Similarly to Jonah’s planar projection method, described on his blog, I used a closestPointOnSurface node to place my joint (on my eyebrow in this example). To get this point I placed a locator along my eyebrow where I wanted my joint to be. It wasn’t necessarily a point on my NURBS surface because I knew it would “snap” to that surface anyway. Using the UV coordinates of that locator I was able to drive my joint along my skull surface.
In the screen recording above, I also have a wire deformer set up which explains the deformations not following the joint correctly. The joint is not what is skinned to the eyebrow geometry, the cluster deformer is controlling the wire which is deforming the eyebrow geometry.
I’ve also been working on scripting my process in order to troubleshoot faster. With the help of my friend James Johnson, I’ve been able to get my teeth set up and my eye setup started.
The goal is to properly setup the eyes with lattices for the open eyes and wire deformers for the extra eye shapes. Ons this is complete the animator with be able to switch through all the shapes at will and manipulate them into a variety of poses, all while sliding on the skull surface (which will not be visible to the animator).
-
Despite working on this project for about 2 months, I’m still in “trial and error” with different techniques to achieve what I want. One of my goals is to have a fully functioning rig, and I worry that I may not get to that point. Figuring out this set up has taken longer than anticipated, and most things I try only work on a smaller scale. This weekend I plan on getting as much done as I can in terms of getting something to work. My thesis class has another milestone on Tuesday, and I plan on having something of value to show. I may need to schedule a couple of meetings to talk this through so I know I’m on the right track.
My committee chair suggested I use MASH to get joints to slide on a surface using this tutorial, but it seems to be more work than its worth. I’ve yet to test out Jonah’s unwrapping method he cites here in his blog, but I’m hoping to have success with it. I’m still in contact with Jonah so the hope is to be able to get that working and move forward building my rig. Due to time constraints I may abandon building the body rig altogether and just stick with the face rig.
There’s so many components I need to solve, so I’d like to at least get the main one figured out so I’m not caught up in the details before anything actually works.
-
I spoke with Adam Burr again Sunday night just to touch bases and get some advice. It was really a brainstorming session to help me get through some mental roadblocks.
My biggest roadblock was actually setting up my facial rig. I’m still continuing to follow along with Jonah Reinhart’s blog, but I wasn’t able to successfully setup his second method, using set driven keys. I reached out to Jonah a few times but still couldn’t fully wrap my head around it, then I sent my file to my chair so he could help me and the problem seemed bigger than I had originally thought. After conversing with Adam, we came to the conclusion that I needed to abondon it. I can’t afford to keep putting time into something that I don’t fully understand. And we spent some time looking at other projects that used surface based facial rigging and realized everyone that has run into this problem has come up with their own unique solution. That scared me a bit. I had never done anything like this before, how was I going to come up with my own solution? But that’s where my topic comes back into play. I’m trying to combine a bunch of different techniques to make my rig possible. I don’t need to come up with a brand ner, never before seen setup, I just need to come up with something that works. Adam had made a good point; it’s not about the tech or how cool your rig is under the hood. It’s about getting the desired result in the most efficient way possible.
We were also able to brainstorm a bit on how to approach my particular character. Billy has a wide range of facial expressions and his different mouth poses would be really strenuous on a single piece of geometry. It would be best to rig different heads and have the animator switch between those. In addition to his wide range of facial expressions, Billy is mostly seen from a 3-quarter view, so I need to cater a lot of my solutions to fit his 3-quarter view.
All in all, my viewpoint needed to change. I was getting too caught up in the details and the tech of everything, that I wasn’t really thinking about how it was all going to work together, and that’s partially why my progress has been so slow. My upcoming goals include:
- Messing around with Billy’s geometry to see how it looks when it deforms
- Use this to try and get the different mouth shapes on the expression sheet
- Try using MASH and see how that goes
- Try implementing James Johnson’s setup for the eyes
- Stop doing research, it’s time to rig
- Messing around with Billy’s geometry to see how it looks when it deforms
-
I spoke with an old friend of mine yesterday about my thesis worries, mostly the time constraint. James Johnson, a character rigger and technical artist, gave me some advice on how to go about my thesis project. I told him how one of my goals for my thesis was to show that you can achieve an efficient and effective stylized rig without needing any custom scripts or plugins, just using the tools and features that are native to Maya. In my mind, that meant doing everything manually, down to creating a parent constraint for each control and joint. Unfortunately, that is a big time drain; he agreed. So what’s the solution? Automation! There is no reason as to why I need to do everything manually, especially if there is a script that can do the same thing in the click of a button. Just to be clear, I’m not saying find someone else’s script online and have it do my whole project for me. Let me break it down:
The most time consuming tasks for riggers tend to be the most repetitive such as:
- Creating custom controllers
- Adding multiple of the same constraint
- Creating multiple of the same setup (ex. stretchy limbs, IK/FK switch, etc.)
- Adding custom attributes
- Setting up foot roll
You get the idea. All of these tasks can be done in Maya manually without any scripting or plug ins needed, but it would take a lot of time. So why don’t I just automate the mundane tasks of my project? I already know how to do it by hand, and I understand how it’s supposed to work, so if something goes wrong I can fix it.
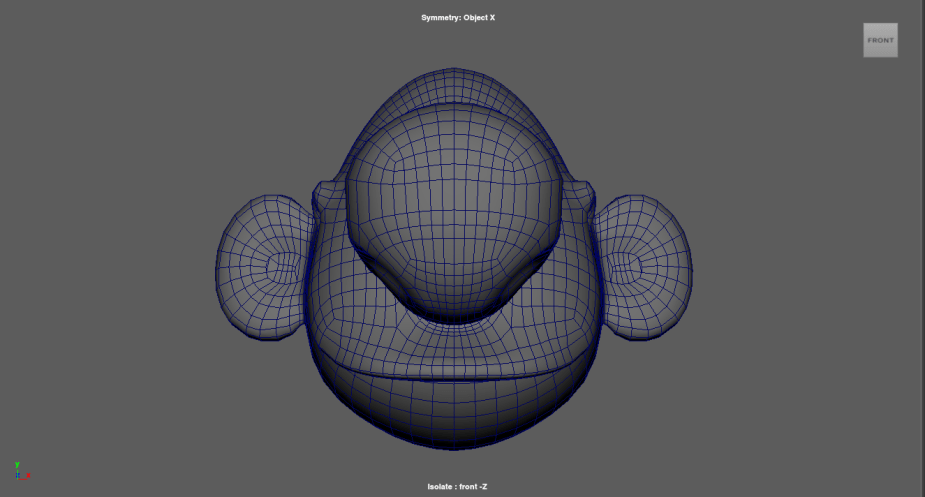
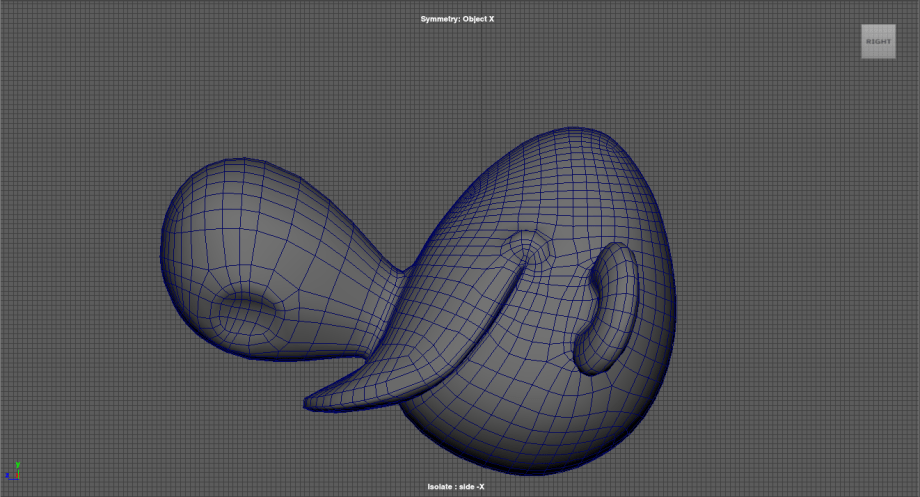
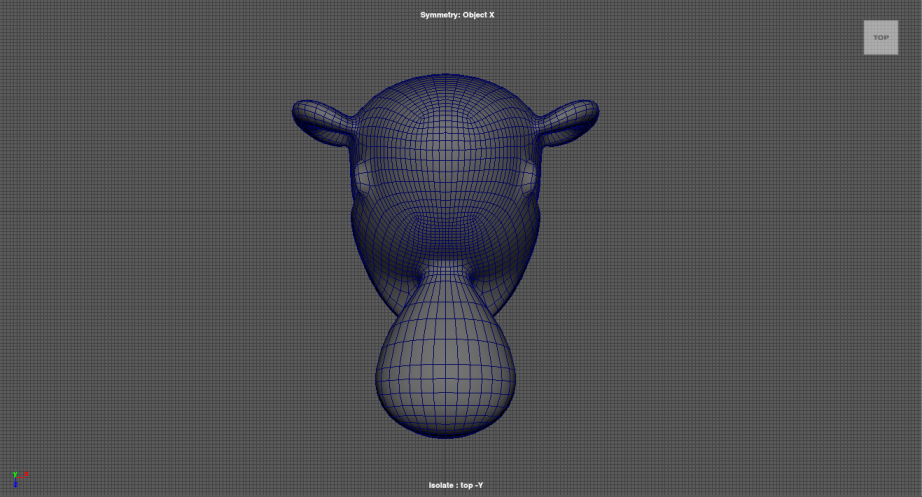
Basically, James suggested I automate the surface and joint set up so I can actually spend my time working on the real time consuming part: sculpting the additional heads for Billy.
Being a rigger isn’t just about knowing how to rig. It’s about understanding sculpting, topology, anticipating problems animators will run into, and so much more. This project alone has taught me so much already, and I’m not even at the halfway point.
Today, James gave me a little demo on how I could setup Billy’s eyes. I deconstructed his file and was able to recreate it myself.
James’ Eye Set Up:
- Create 2 null groups
- world_type_up_grp
- skull_surface_normal_grp
- Point constrain the eye control to skull_surface_normal_grp
- parnet constrain skull_surface_normal_grp to eye_geo_grp (offset group for eye geometry)
- Geometry constrain skull surface to skull_surface_normal_grp
- Normal constrain skull surface to skull_surface_normal_grp
- world type up should be set to object up
- world up object should be world_type_up_grp
- (these will appear in the options menu for normal constraint)
-
This past Wednesday I was able to speak with Stephen Gressak, another rigger that worked on The Peanuts Movie. He spoke a lot about his experience with surface based facial rigging, and how it goes all the way back to his work on Ice Age 2. It wasn’t until The Peanuts Movie that there was a proprietary tool for it, with the help of Adam Burr. In the technical demo reel that he shared with me, he also talked about the AnimCurveSampler, a tool that he developed alongside Michael Comet and Scotty Sharp. It allows TDs to interactively edit the poses on rigs. This goes all the way back to Robots, and was further developed during Ice Age 2.
For his facial rigs on Ice Age 2, he used surface volumes (3D geometry that resembled the character’s head shape). The example on his demo reel was Sid’s face rig, and how his mouth would follow along the surface of that volume. An early version of what ended up being developed for The Peanuts Movie you could say.
I told him about how I was following along with Jonah Reinhart’s blog, and he mentioned that a planar projection method would lead to a very poo control interface. This is due to the controls being aligned with the flat surface, and not with the character’s head, so there is a significant visual disconnect, making it difficult for animators to tell which controls affect which part of the character. I also told him about my conversation with Ignacio and Adam, and he also encouraged rig switching. We also spoke about “locking” lines to the camera. This is in regards to the additional lines Billy has when he squints his eyes, similar to the “strip eyes” on the Peanits characters.

In addition to my thesis, he also informed me about the importance of being well versed in AI. He shared a few links with me to look into regarding the future of AI in art.
Runway Customers | Behind the scenes of “Migration” with director Jeremy Higgins
AI has never really been on my radar, especially as a rigging artist, but it is definitely something I will be looking into more.
-
Last Thursday I was able to speak with both Adam Burr and Ignacio Barrios, he was a character rigger for The Peanuts Movie. After catching up Ignacio on my thesis and other details Adam was already aware of, I was able to show both of them the progress I had made since my initial meeting with Adam. I started a new Maya scene with a much simpler model and began building a surface based facial setup up, following along with Jonah’s blog.
This is a video I had recorded for Jonah with some questions I had as I was working on this setup. This is essentially what I had showed Adam and Ignacio regarding the progress I had made.
Ignacio was also able to give me some really good feedback on the Billy model. He thought it would make things a lot easier if the resolution of the model was lowered. This weekend I attempted to get it down, but I am also speaking with my modeler Kate so she can get it cleaner for me.


Both Ignacio and Adam agreed that due to the nature of Billy’s extreme poses for his mouth, I create a rig that can “switch” heads. Ignacio recommended I take a look at the original dialogue I had chosen and analyze it, then identify the 3 or 4 extreme poses. Those are the poses that will need extra heads sculpted and blendshaped together. This will allow the animator to “switch” heads and get a wider range of expressions. If I were to keep the rig exclusively joint based, there would be so much stretching and compressing of the geometry that it wouldn’t look good. Both of them were emphasizing the importance of a low resolution model. This means there is a lesser chance for the model to have unwanted wrinkles and creases, which normally would be fine for a more realistic and anatomically correct model, but not ideal for simpler, stylized characters.
Hopefully these meetings can become weekly, this way I can get as much input on my project as possible.
